How to Make Your Own Silicone Molds for Art Work
This mail shares how to make your ain silicone mold using EasyMold Silicone Putty. Silicone putty is a quick, easy, and cost-effective mode to make your own silicone molds for food crafts, resin crafts, clay crafts, and more. I received the silicone putty used in this tutorial for complimentary; nonetheless, my review of the products is 100% unbiased.
How to Brand Your Own Silicone Mold: EasyMold Silicone Putty Review
Hey guys! I'm sharing a product review and tutorial today. It's been a long fourth dimension since I've done one of these reviews, and so I'chiliad excited to dig in and try something new: making my own silicone mold. I'm specifically making this mold for utilize with resin and volition exist using and reviewing ETI'southward EasyMold Silicone Putty.
What is EasyMold Silicone Putty?
ETI'south EasyMold Silicone Putty allows yous to create molds of small objects. The easiest mode to use it is to create impression-type molds. It's odorless, non-toxic, FDA compliant, and nutrient grade. This is all very important if y'all want to apply this putty to make a candy mold, for instance—or annihilation that will be ingested.
This silicone putty works smashing for crafts using resin, wax, baking, candies, water ice cubes, lather, air dry clay, concrete, plaster, and fifty-fifty low-melt metals. Once cured, the molds have a high heat range—upwards to 400 degrees Fahrenheit.
They volition not shrink, are strong and flexible, and are cocky-releasing—no mold release agent required, which is one less affair to buy! Oh, and they're reusable, but I haven't used a mold twice nevertheless. So I tin can't speak to how well they concord up and when they begin to deteriorate.
Annotation: The instructions for the EasyMold Silicone Putty do say that molds used repeatedly may accumulate a buildup of material from castings. You can utilise a mold release/conditioner to assistance restore your molds if this happens—only remember to use only nutrient safety mold release/conditioners if y'all mold is for food. will aid to prevent this build up and restore your molds natural releasing properties.
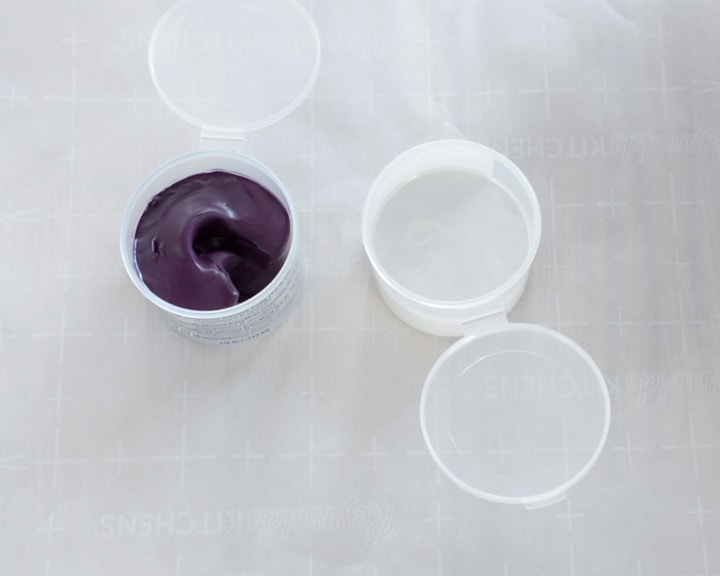
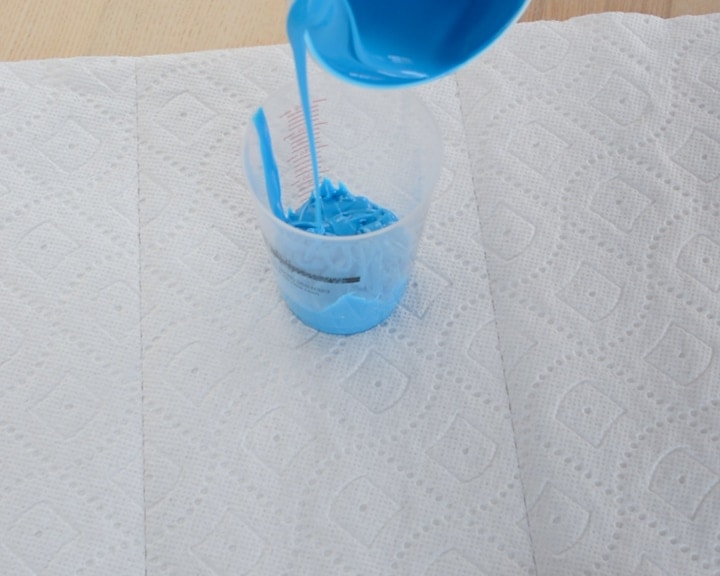
Information technology really is easy to use, too. The putty comes in two jars: one with purple putty and 1 with white putty. Y'all just mix the two together and make your mold. But yous accept to piece of work quickly—it has a 3-infinitesimal working time, and you should take the 2 components totally mixed together in only 1 minute.
How to Make Your Own Silicone Mold: Making a Snowflake Mold for Resin
(Read all EasyMold official instructions and warnings before getting started.)
Step 1: Mix the two parts of silicone
(Curing Notation: There are some things that the EasyMold instructions say will inhibit the silicone from fully curing: items that incorporate sulfur (masking tape, clays, and latex gloves) or stearates (soap). Avoid direct contact with craft paints that contain chromium, copper, or black pigment, as well every bit water, peroxides, and alcohols).
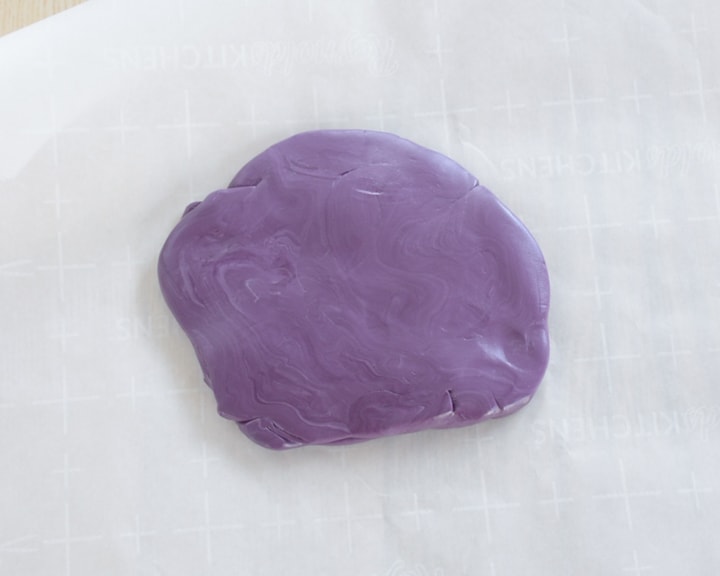
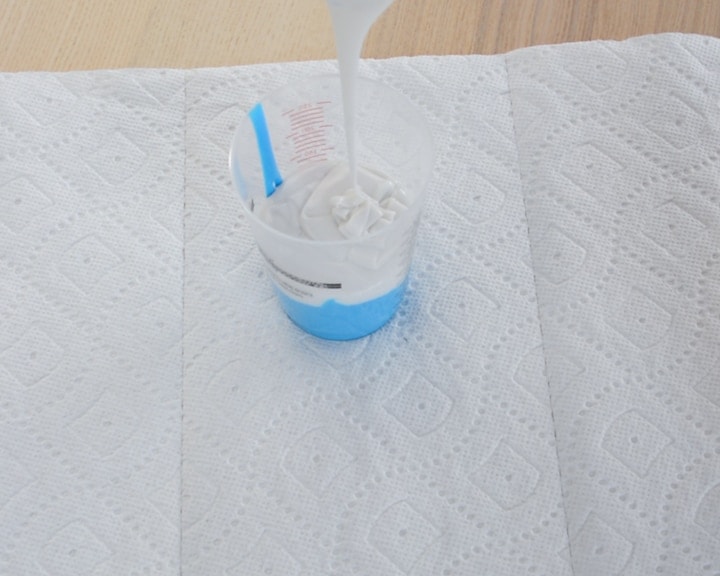
Rapidly mix the ii parts of silicone together. You lot can exercise this by kneading it on a clean, flat surface. It's pretty squishy, and so you lot can squeeze it to help mix it together. Retrieve to work speedily…this stuff has a iii-minute working time! Those are 3 precious minutes.
You should be able to achieve a swirl-gratis consistency in about one infinitesimal. I didn't use gloves, but if you desire to use gloves, do NOT employ latex gloves. They have sulfur in them, which can interfere with the mold curing after you take your impression. Utilize vinyl or nitrile gloves.

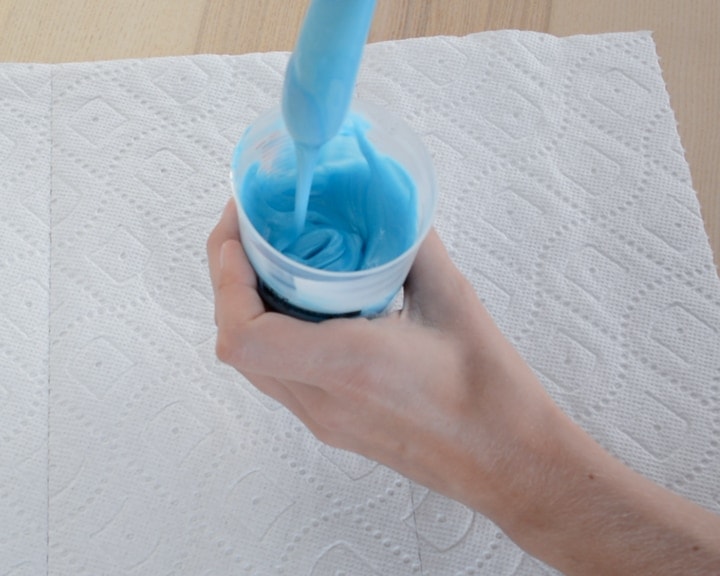
Pace two: Scroll and flatten mixed silicone
Once both silicone components are completely mixed, roll the silicone into a ball immediately and gently flatten. You can use a rolling pin, but make sure the rolling pin information technology totally clean. You should flatten the putty based on the depth of the impression y'all'll demand. Don't brand it too thin—the cured mold could tear.
Step iii: Employ an object to create an impression
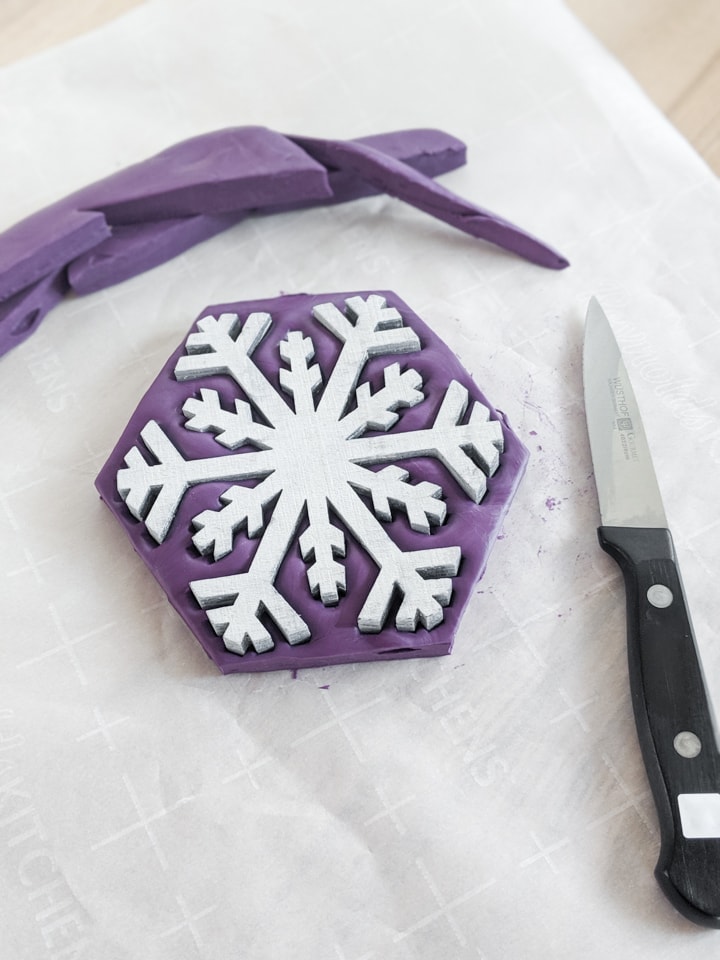
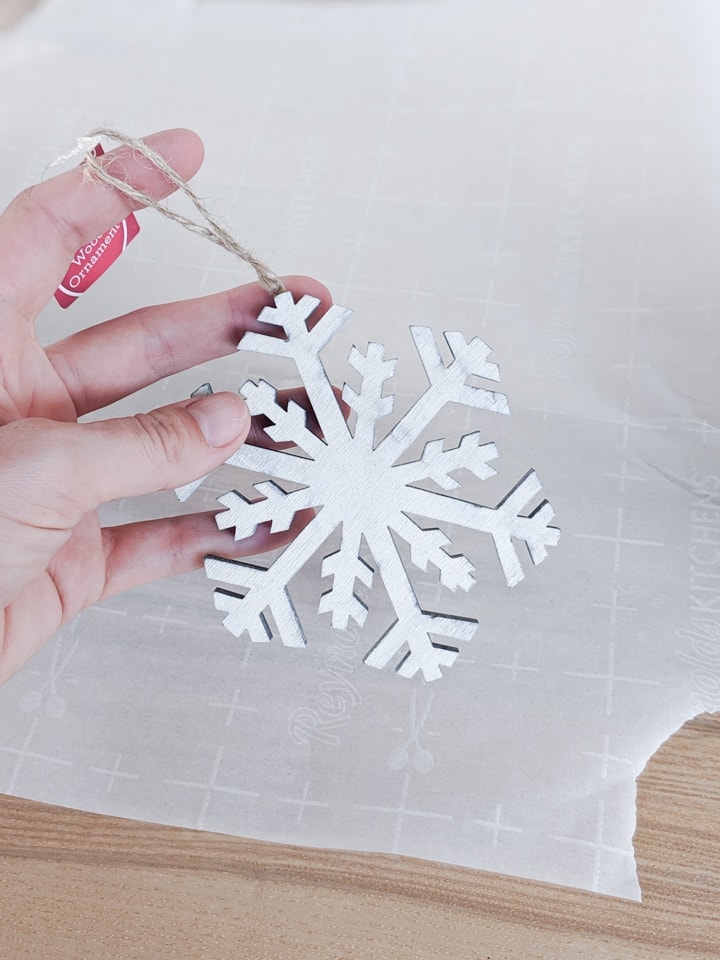
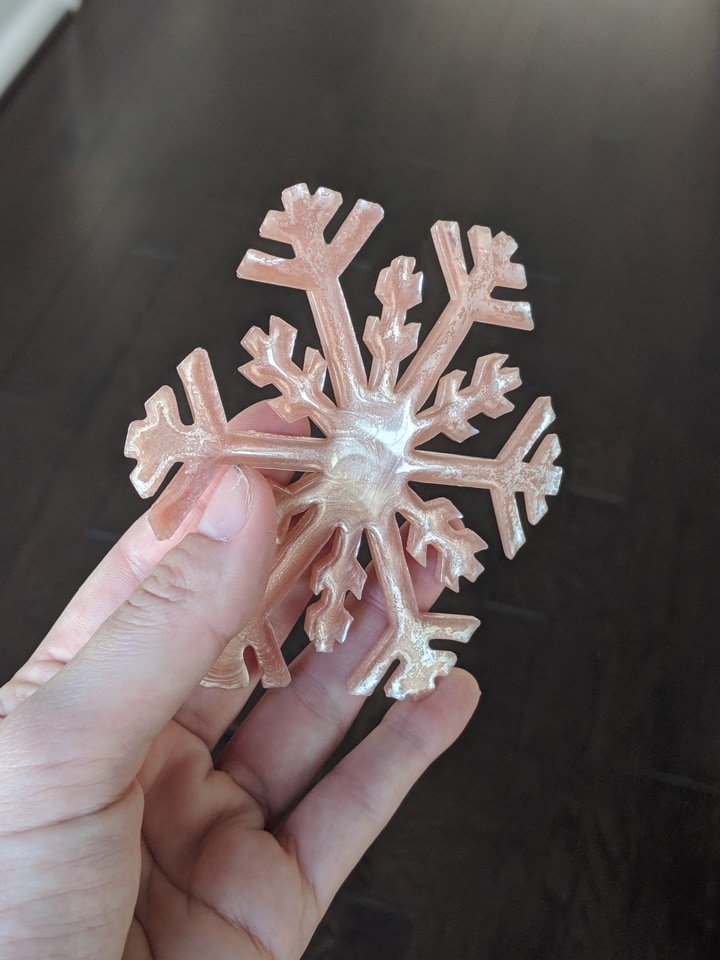
I'm using a wooden snowflake decoration to make an impression. The instructions for the putty exercise say that some items may comprise sulfur or stearates, which can inhibit curing. Soaps, for example. If the item you're using to make an impression has one of these, just coat it with acrylic spray to seal it first. The instructions likewise recommend testing a small piece of putty on the item first, but I skipped that.
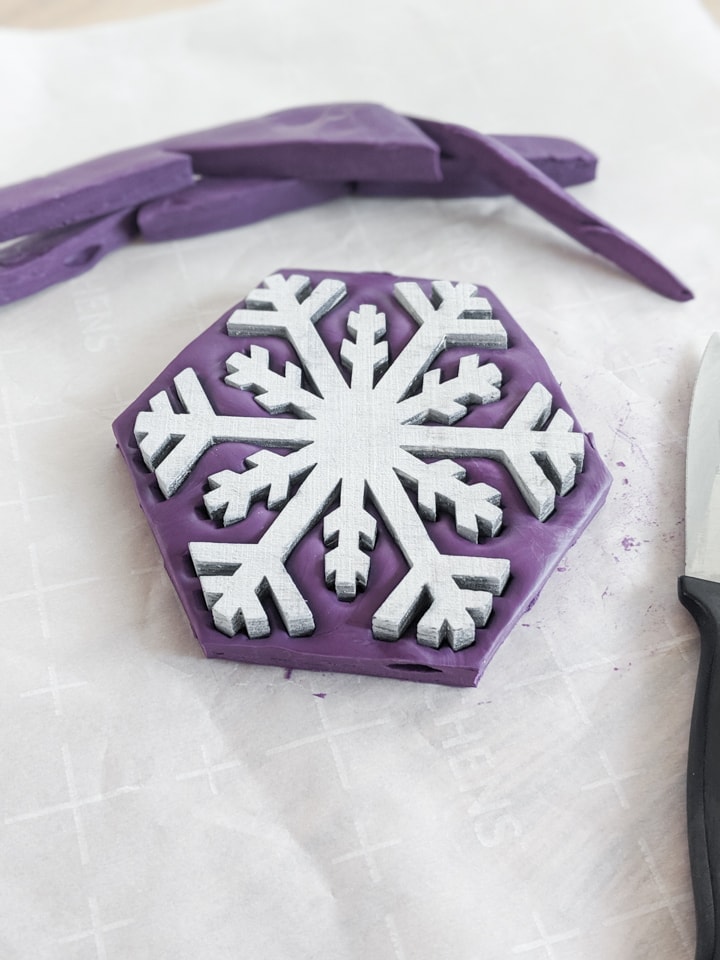
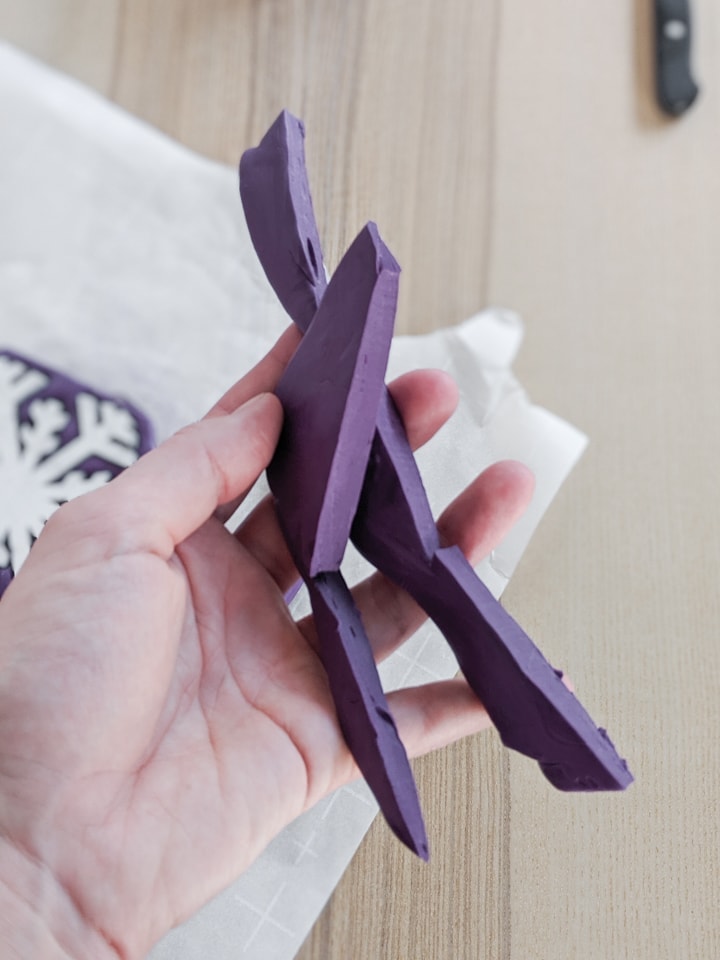
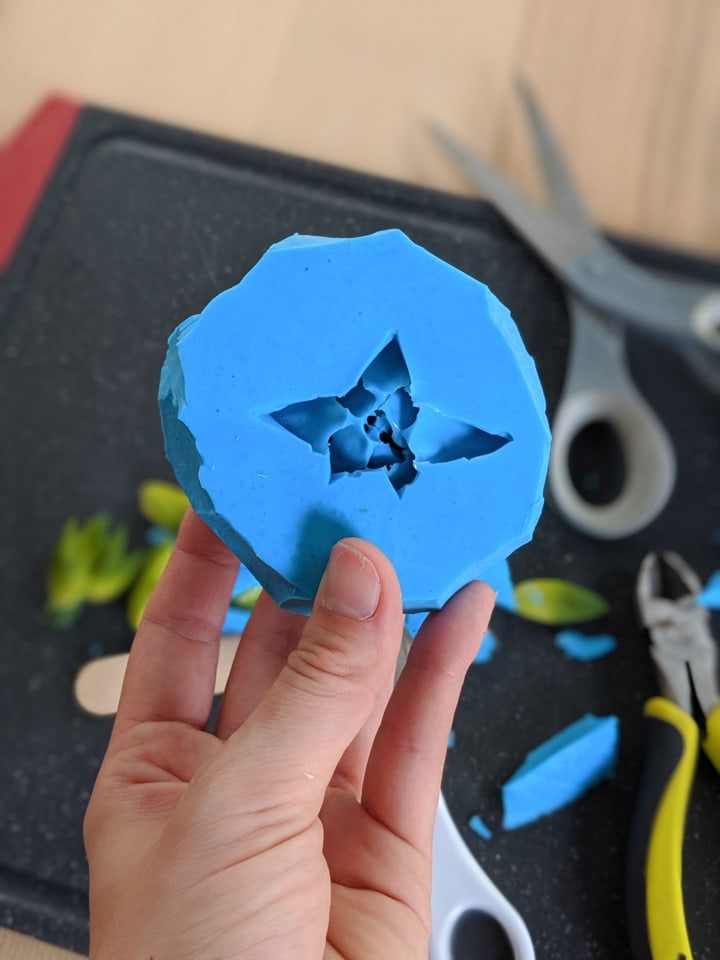
I quickly pressed the snowflake down into the silicone until I was happy with the placement. Then I took a knife and cut out effectually the snowflake merely to make the mold look a bit more professional. I left the snowflake in the putty for the entire cure fourth dimension, which is 25 minutes. Actually I left mine in for a bit longer considering I was working on something else.
I was really impressed with how quickly the putty began to solidify. They aren't kidding when they say it has a iii-minute working time. And between 4 and 25 minutes, information technology solidifies completely. Pretty amazing.
Want more resin projects? Check out my epoxy resin paint pour for beginners tutorial and my tips on whether to use a shiny or matte silicone mold for resin projects.
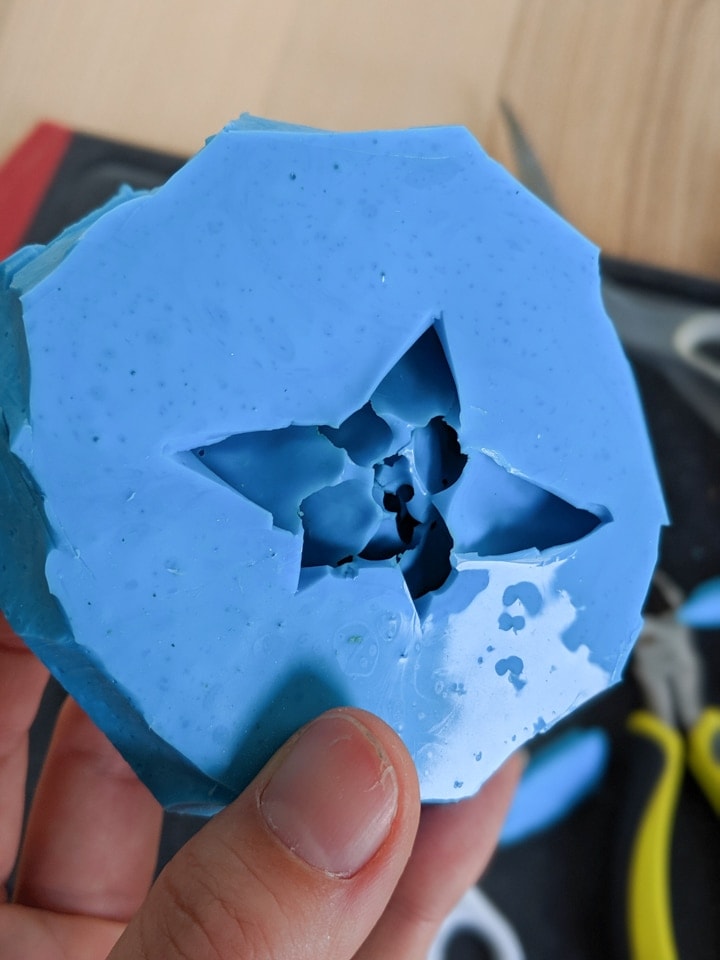
Stride 4: Remove object and rut cure if needed
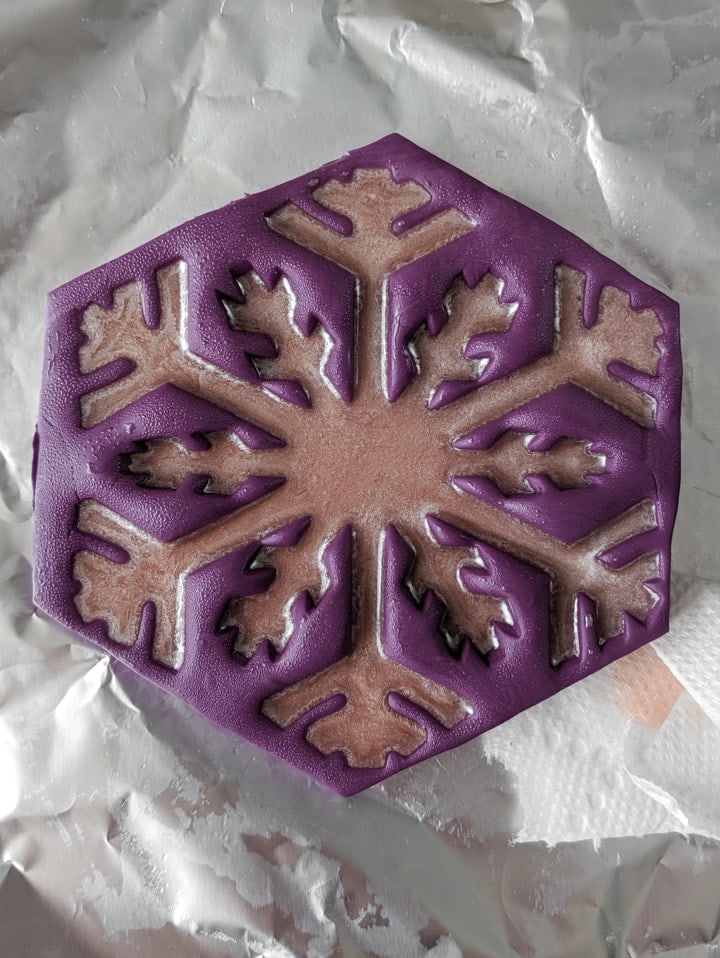
I removed the snowflake from the mold. Afterwards the cure time, the mold is ready to use. Even so, the instructions say that if you lot're using a resin casting product, concrete, or plaster, the mold needs to cure at room temperature for 24 hours first.
If you're feeling impatient, you can rut cure the mold by putting the mold only (not the item you are making an impression of) in the regular oven (not a toaster oven) on aluminum foil or a cookie sheet. The guidelines say to place in the center of the oven—or at least 6" from the heating elements—and brand for 350 degrees Fahrenheit for thirty minutes. I did test out heat curing mine, and information technology worked just fine.

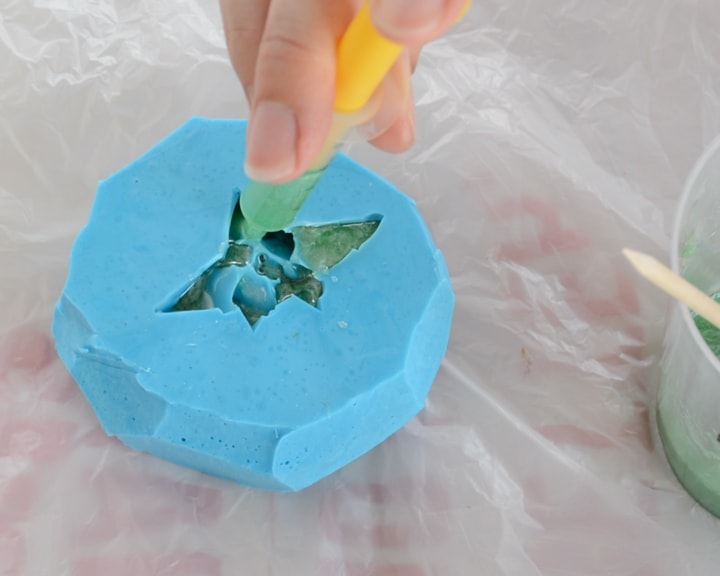
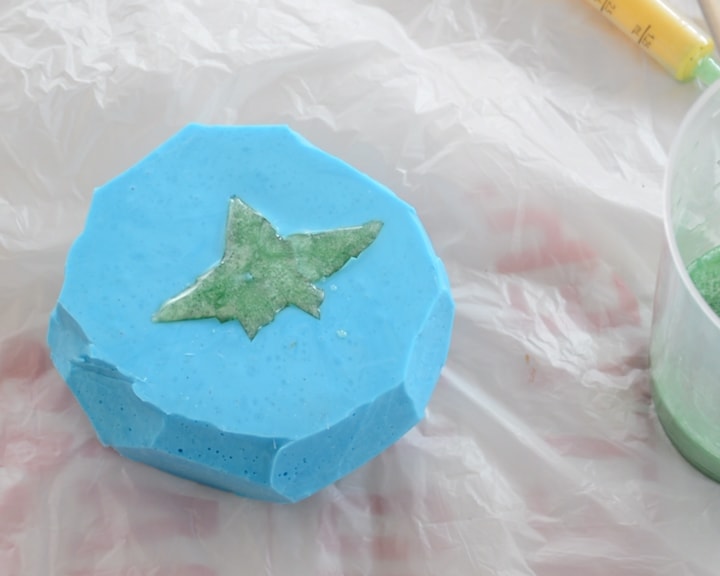
Casting Resin in the DIY Silicone Putty Mold
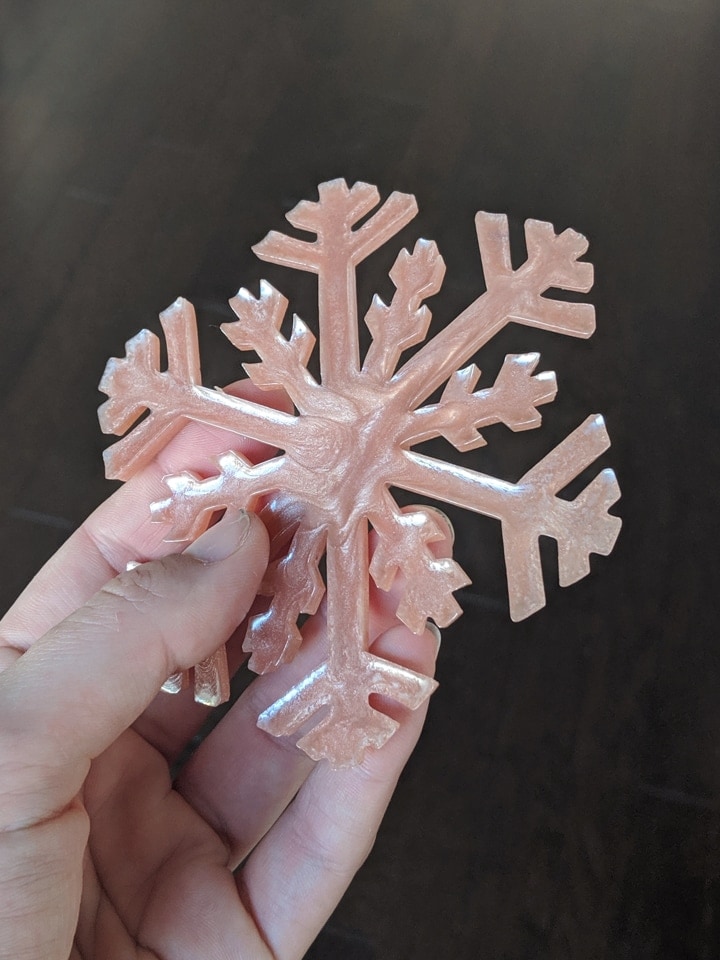
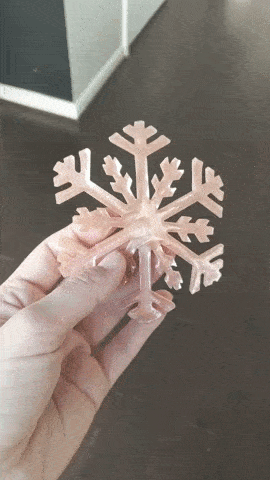
To test out my mold, I used a 2-part epoxy resin colored with a light pink mica dye powder. And information technology worked out great! The mold did develop a bit of a condensation on it, but I didn't wipe or clean it before using it.
I poured poured the colored epoxy resin and let it cure according to my resin's instructions. I too used a rut gun to pop the bubbles and ensure it cured without any imperfections. The next morning, I popped it out easily. It turned out amazing! The mold released it very quickly and easily, and there are no imperfections in the mold afterward using it in one case. It'due south very strong.


Like resin? Check out my tips for how to make resin jewelry using molds and how to brand a gorgeous DIY marble and woods tray!
How to Make Your Ain Silicone Mold: EasyMold Silicone Liquid Prophylactic
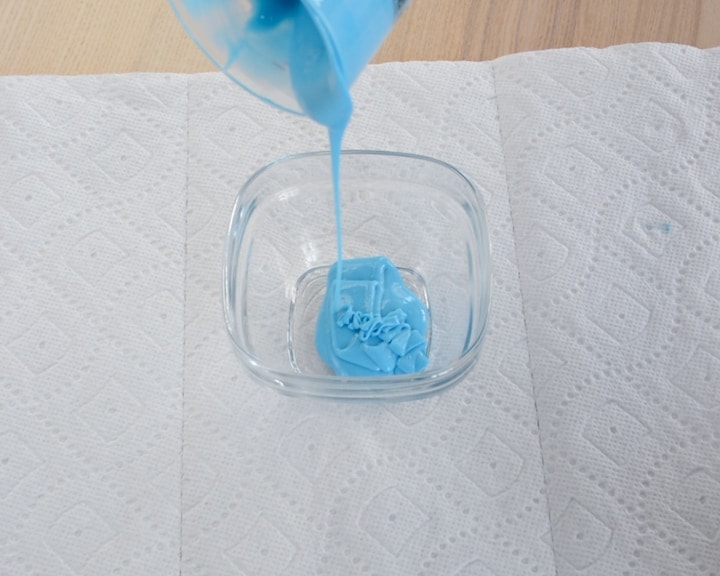
There's a 2nd way to brand your ain silicone mold that I tried out and want to share. While the outset version used a silicone putty to brand an impression mold, the 2nd using a pourable/castor-able liquid silicone to brand a mold.
Much like the putty selection, EasyMold liquid pourable/brushable silicone rubber is great for a broad diversity of molds: resin, wax, blistering, chocolates, water ice cubes, soap, plaster, clay, physical, and low-melt metals. The biggest difference betwixt the putty and the brushable/pourable silicone is that the putty is for impression molds.
That is, pushing something into the putty to make an impression of it. The liquid pourable/brushable silicone safe is for blanket, glove, or cake molds. It is as well non-toxic, FDA compliant, and food grade.
What is EasyMold Silicone Liquid Safe?
Since this silicone is pourable, it has longer working and curing times compared to the putty. Instead of the putty's 3-minute working time, the liquid has a 45-infinitesimal to one-60 minutes working time. And a 24-60 minutes cure time. (You lot tin can cure yours faster using rut, just I didn't.)
The liquid can get into every nook and cranny of the item yous're making a mold of, meaning information technology produces great detail. No mold release required for about applications, and it has a loftier estrus range of upward to 400 degrees Fahrenheit. The molds are reusable if they aren't damaged (mine was damaged, will talk more almost that in a scrap).
To ensure your mold cures properly, take the same precautions required for the putty. Don't use annihilation with sulfur: masking tape, certain clays, latex gloves (use vinyl or nitrile gloves instead), or soap that contains stearates. Avoid arts and crafts paints that comprise chromium, copper, or black pigment. Avoid contact with h2o, peroxide, or booze.
I wanted to cull something a bit more difficult to brand a mold of because I'm a glutton for punishment. So I chose a minor faux succulent…I didn't mind if information technology got destroyed in the trial-and-mistake process. 🙂
How to Brand Your Ain Silicone Mold: Making Delicious Blossom Mold for Resin
(Read all EasyMold official instructions and warnings before getting started.)
Footstep 1: Decide on the type of mold you'll brand
Decide what kind of mold you'd like to make: a glove mold, a blanket mold, or a block mold.
- Glove Mold: A glove mold is one of the easiest molds to make. You lot can brand a glove mold by brushing the EasyMold Silicone Rubber onto your particular. A few coats are required for full coverage, excellent detail, and strength.
- Coating Mold: A blanket mold is generally best for flat, two-dimensional pieces.
- Block Mold: A cake mold uses a container to concur the object you're making a mold of and the silicone rubber while it cures. It's generally all-time for reproducing an entire object.
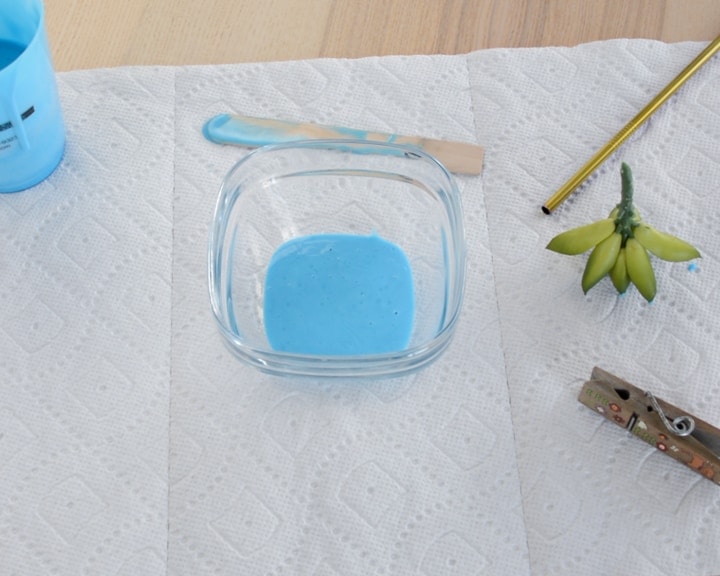
two: Mix the ii parts of the liquid silicone
I decided to brand a block mold. But I probably should take chosen a glove mold. More on that in a bit. So I mixxed up my two-part silicone start. If you lot're doing a block mold, ETI recommends estimates how much silicone y'all'll demand using uncooked rice.
To exercise this, put the item in the container y'all'll utilize, then add rice. Once the item is sufficiently covered, pour the rice back out and measure how much you needed. That'due south how much silicone you'll demand.
Footstep 3: Position the item yous're making a mold of and cascade
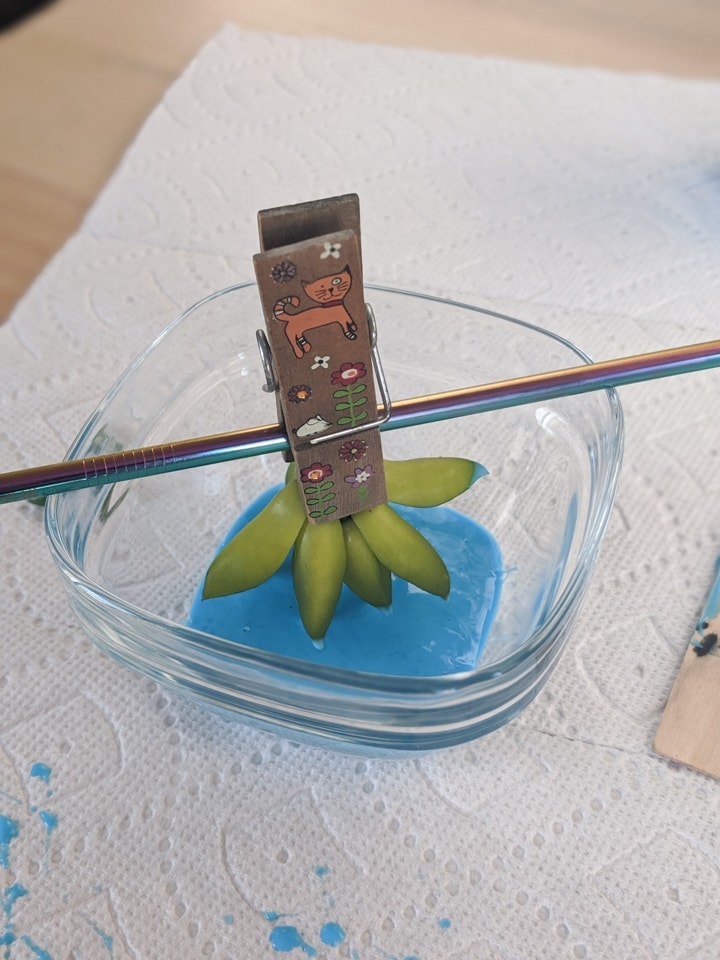
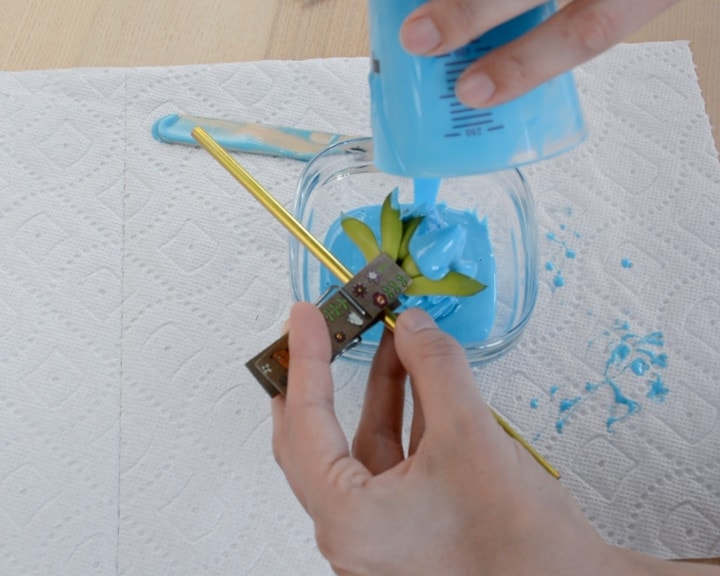
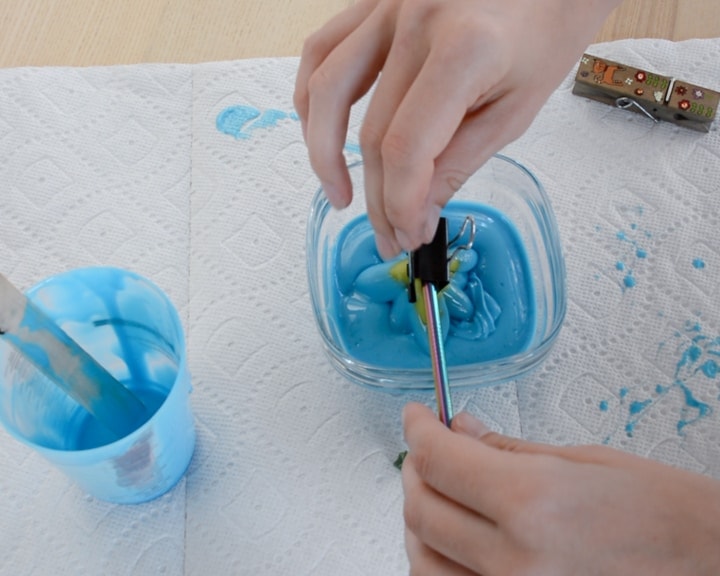
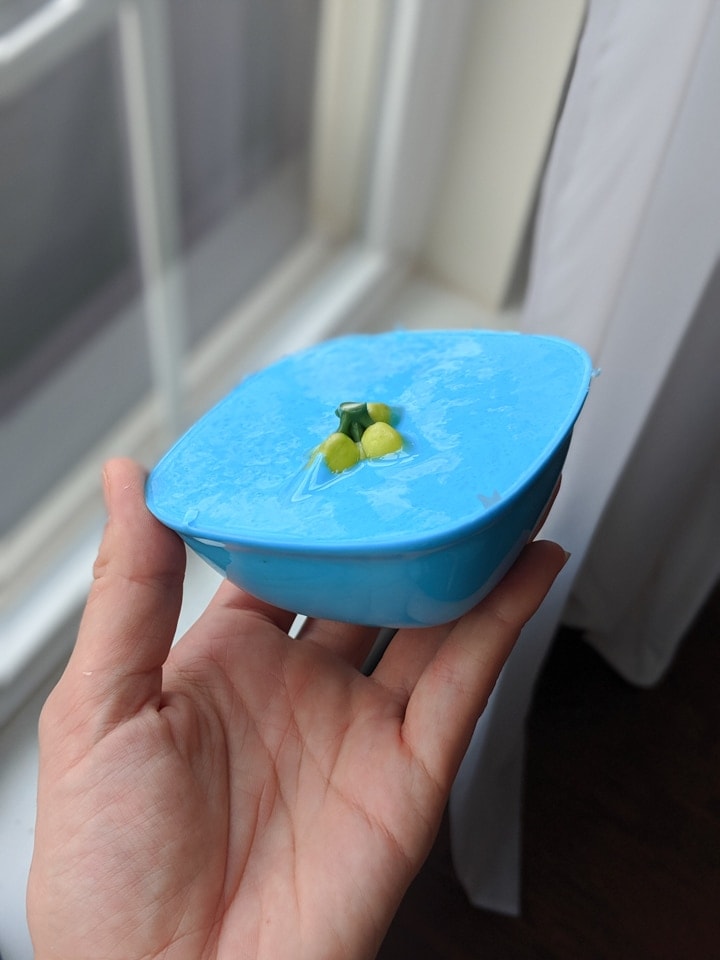
To make my block mold, I poured a bit of the silicone into the base of operations of a modest container. (Remember, this silicone is nutrient safe, so no worries in that location.) I and so put my succulent effigy upside downward into the container, making sure it didn't hit the very bottom of the container.
I used a clothespin and a reusable harbinger to position the delicious in place while I poured the rubber. This was necessary and then the delicious wouldn't fall to the bottom.
If you were making a glove or blanket mold, you'd apply three or iv layers of the silicone with a small brush. Let each layer cure for about one hour before applying another layer. Speed upward the curing time with a oestrus source (hair dryer, estrus lamp, rut gun, etc.).
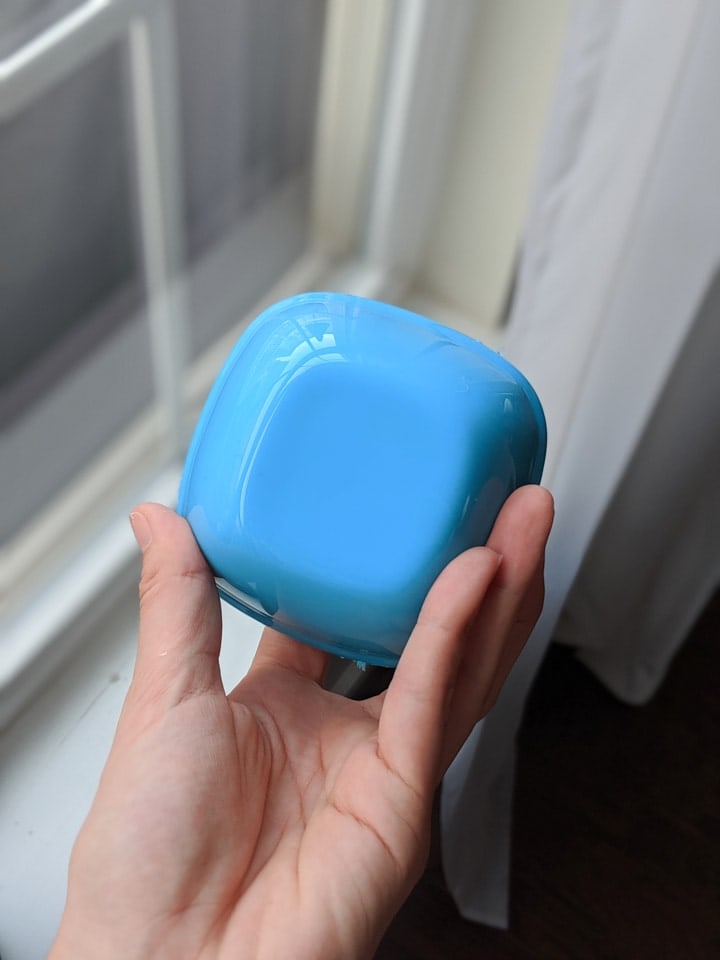
Step iv: Let cure and remove the object
Subsequently my mold was done curing, I used a popsicle stick and a spoon to pry it out of the container. The good news is that this silicone cures actually well. It was very tough and strong. The bad news is that that meant I couldn't easily get my succulent out of the silicone. I didn't leave enough of an opening at the pinnacle.
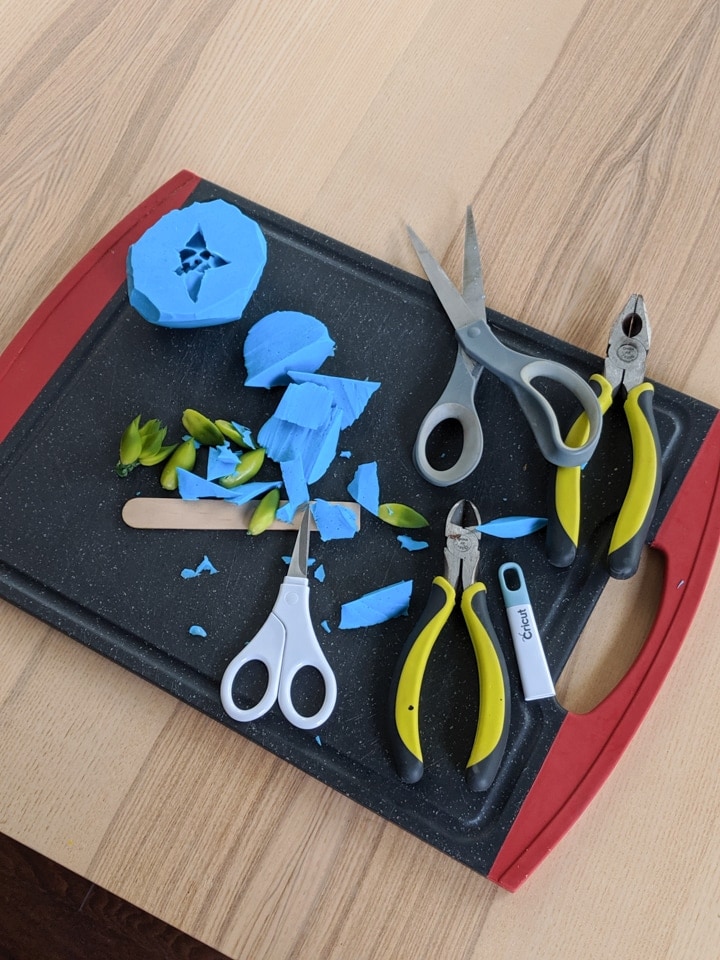
Here's what I did. Showtime I cutting off the corners to hopefully give me more leverage to popular the delicious out. No dice. Then I decided to pry the succulent out. It's a skilful thing I wasn't smashing on keeping the succulent, because I ended up pulling some leaves off in the procedure. Oops! Definitely exit a bigger opening than I did!!
Casting Resin in the DIY Liquid Silicone Mold
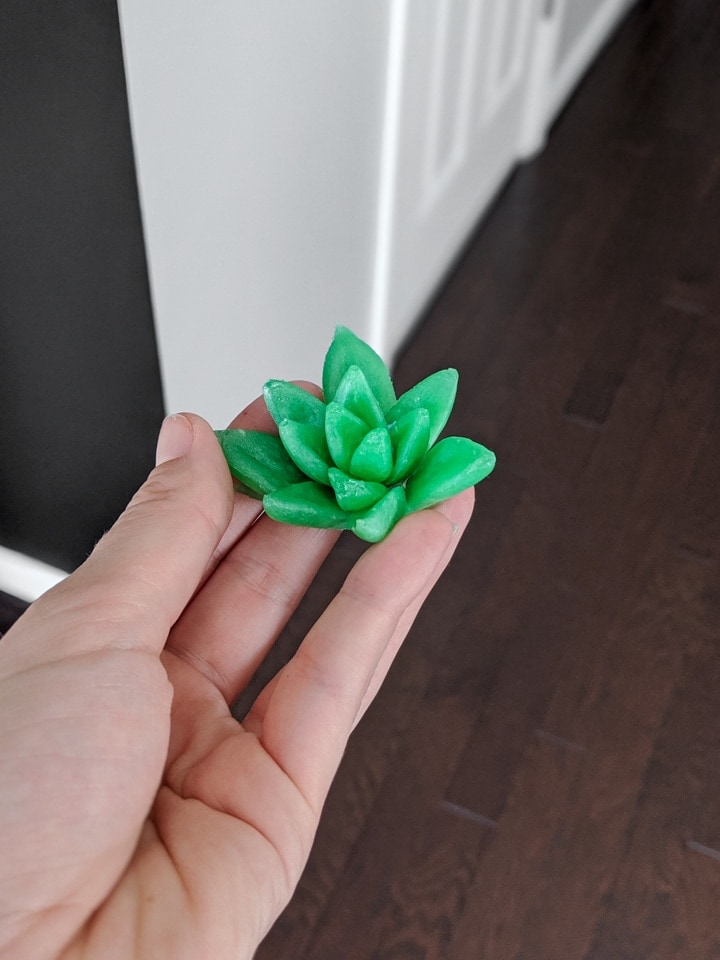
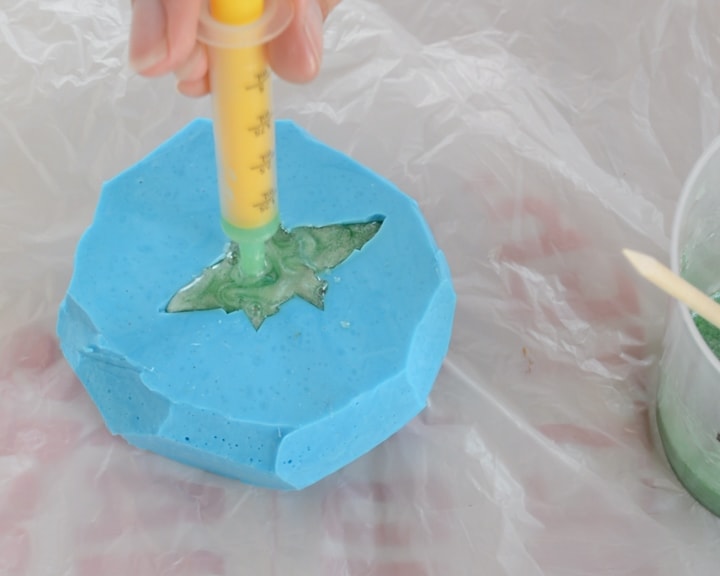
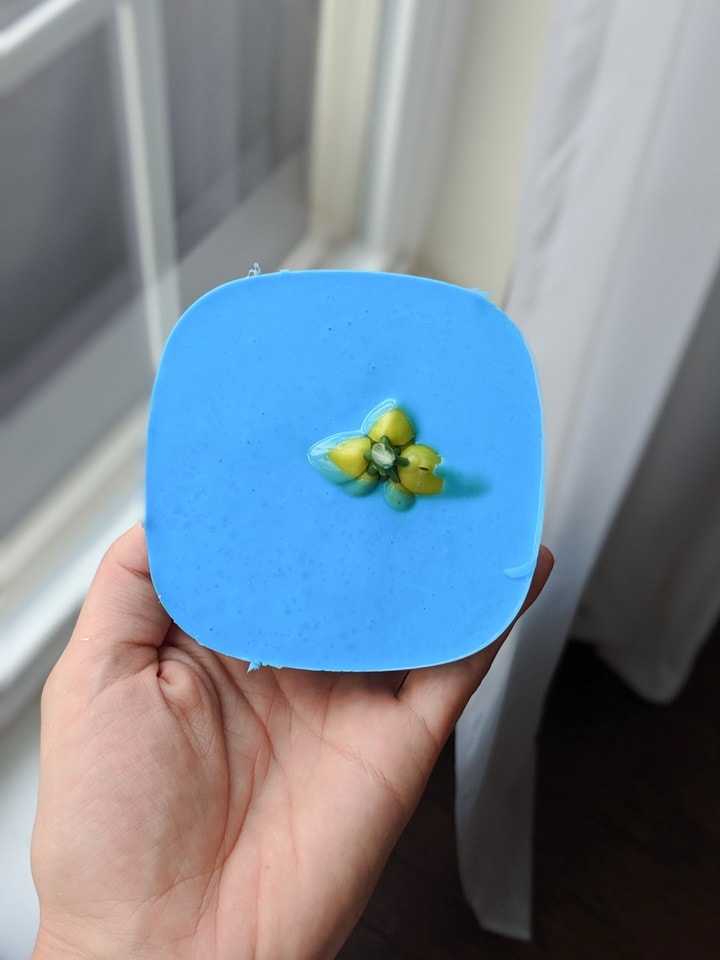
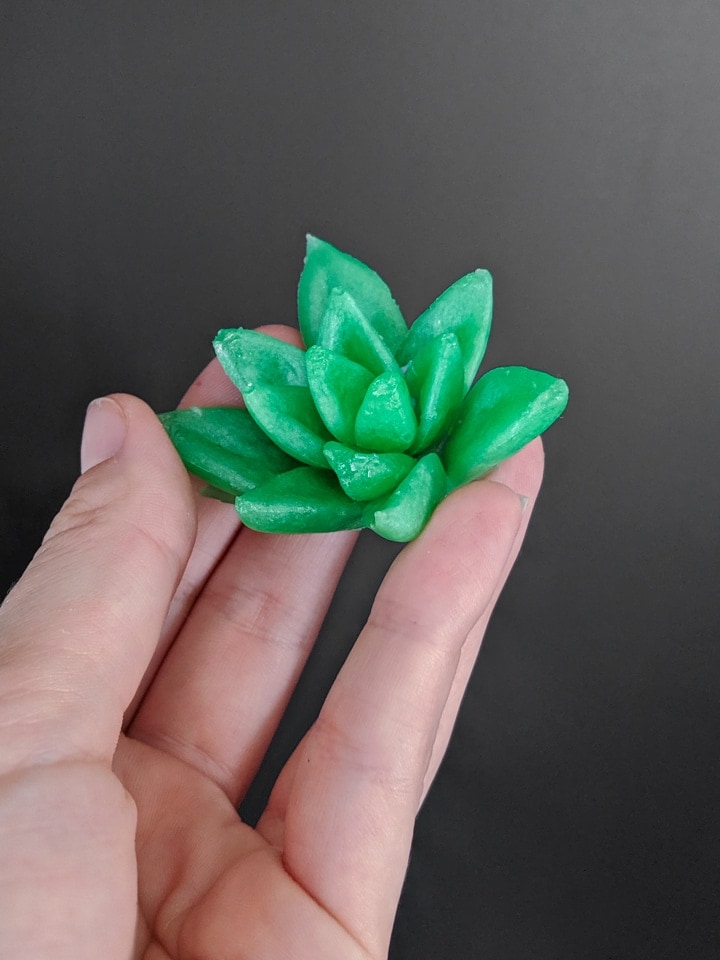
I wanted it to be a bit easier to get my resin succulent out of the mold, so I utilize a pair of small scissors to strategically cutting the opening out a bit more than and then used a small syringe to fill the mold with green-colored resin. After that cured, it was time to get it out.
Long story short—I had to cut the mold upwardly pretty badly to become the resin delicious out. Kind of defeats the purpose of springing for silicone that makes reusable molds, right? Only it was a trial and error process. I now know that for an item similar this, it would probably exist best to practise a glove mold or a multipart mold. Nonetheless, you tin see that I actually was able to replicate the succulent! Pretty cool.

This was definitely a fun process, and I enjoyed working on a new skill. Hopefully some of my mistakes help you lot if you're Googling around wondering how to make your own silicone mold. I highly recommend both of the products I tried out! Good luck!
Share my postal service about how How to Make Your Ain Silicone Mold on Pinterest!
Source: https://letscraftinstead.com/make-own-silicone-mold/
0 Response to "How to Make Your Own Silicone Molds for Art Work"
Postar um comentário